Spring Bootでフォームの値をsubmitで別画面に渡すサンプルです。
(確認環境:Spring Boot 2.5,JDK 11,thymeleaf3)
目次
| サンプル | 画面表示までの流れ / pom.xml |
| 値を送信する側のファイル(index.html) | |
| コントローラのクラス(MainController.java) | |
| 値を受け取る側のファイル(testform.html) | |
| 実行して確認する |
画面表示までの流れ

画面表示の流れは、以下のとおりです。
1.ブラウザからコントローラ(MainController.java)にアクセスする。
2.コントローラがビュー1(index.html)を返す。
3.ビュー1で値を入力しコントローラにアクセスする。
4.コントローラがビュー2(testform.html)を返す。
コントローラは、アクセスするURLに従ってファイルを返します。
作成するファイル
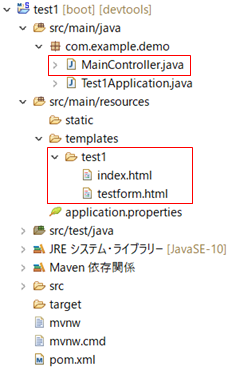
templatesフォルダの下にtest1フォルダを作成しその中にhtmlファイルを配置します。
test1フォルダ配下に指定のhtmlファイルがない場合は以下のエラーが出ます。
org.thymeleaf.exceptions.TemplateInputException: Error resolving template [test1/index], template might not exist or might not be accessible by any of the configured Template Resolvers
※テンプレートエンジンでThymeleaf(タイムリーフ)を使用しているためthymeleafの文字があります。
githubにコードがあります。
https://github.com/ut23405/springboot/tree/master/springboot-form-submit
pom.xml
必要なライブラリです。
		<dependency>
			<groupId>org.springframework.boot</groupId>
			<artifactId>spring-boot-starter-thymeleaf</artifactId>
		</dependency>
		<dependency>
			<groupId>org.springframework.boot</groupId>
			<artifactId>spring-boot-starter-web</artifactId>
		</dependency>
pom.xmlにthymeleafの依存性の記述がないと画面表示時に以下のWhitelabel Error Pageのエラーがでます。
Whitelabel Error Page
This application has no explicit mapping for /error, so you are seeing this as a fallback.
値を送信する側のファイル(index.html)
値を送信する側のファイルです。
<!DOCTYPE html>
<html xmlns:th="http://www.thymeleaf.org">
  <head>
    <meta charset="utf-8" />
    <title>submit</title>
  </head>
  <body>
    <form method="post" th:action="@{/testform}">
      <input type="text" name="text1" />
      <input type="submit" value="送信ボタン" />
    </form>
  </body>
</html>
8行目は、methodでpost方式を指定し、actionで送信先(testform)を指定しています。
9行目は、テキストボックスです。画面から文字を入力します。
10行目は、送信ボタンです。ボタンを押すとsubmitします。
画面イメージ
上記コードの画面イメージです。
![]()
コントローラのクラス(MainController.java)
コントローラのクラスです。
package com.example.demo;
import org.springframework.stereotype.Controller;
import org.springframework.ui.Model;
import org.springframework.web.bind.annotation.GetMapping;
import org.springframework.web.bind.annotation.PostMapping;
import org.springframework.web.bind.annotation.RequestParam;

@Controller
public class MainController {

	@GetMapping("/test1")
    public String input1() {
        return "test1/index";
    }

	@PostMapping("/testform")
	public String output1(
		@RequestParam String text1,
		Model model) {
		model.addAttribute("moji1", text1);
		model.addAttribute("moji2", "こんにちは");
		return "test1/testform";
	}
}
13行目は、test1フォルダ配下のindex.htmlを画面に表示します。
18行目の@RequestParamは、リクエストパラメータを受け取ります。
text1は、index.htmlのテキストボックスのnameです。
18行目は以下のようにも書けます。
@RequestParam(name = "text1") String str1,
@RequestParam String text1,
20行目は、addAttributeメソッドでキーに"moji1"で値を変数str1にしています。
22行目は、test1フォルダ配下のtestform.htmlを画面に表示します。
値を受け取る側のファイル(testform.html)
値を受け取る側のファイルです。
<!DOCTYPE html>
<html xmlns:th="http://www.thymeleaf.org">
  <head>
    <meta charset="utf-8" />
    <title>submit</title>
  </head>
  <body>
    <p th:text="${moji1}"></p>
    <p>[[${moji2}]]</p>
  </body>
</html>
8,9行目はともに、コントローラから渡された値を文字列で表示します。
実行して確認する
springbootアプリケーションを起動※してブラウザに以下のURLを入力するとindex.htmlが画面に表示されます。
※プロジェクトを右クリックしてSpring Bootアプリケーションをクリック。
http://localhost:8765/test1/
値を入力してボタンを押すと別の画面に値を渡して表示します。
関連の記事